A puffer bottle is a manually operated specifically-shaped container that is used to prepare static grass for...

Cart 0 Product Products (empty)
No products
Free shipping! Shipping
£ 0.00 Total
Product successfully added to your shopping cart
Quantity
Total
There are 0 items in your cart. There is 1 item in your cart.
Total products (tax incl.)
Total shipping (tax excl.) Free shipping!
Total (tax incl.)
Search Tips
Tips categories
Latest Tips
-
 What is a puffer bottle?Read more
 -
 How can I learn where to place my signals?Read more
Deciding where to place signals on a model railway layout can be extremely confusing as there are many rules to...
-
 Which railway was the SNER?Read more
S.N.E.R. stands for the Scottish North Eastern Railway, it was the result of a merger between the Aberdeen Railway...
-
 What are powerbase plates used for?Read more
Powerbase plates sound as though they're going to be very high-tech with lots of microchips, wires and a complex...
-
 What is a Wickham Trolley?Read more
A Wickham Trolley is a small railway maintenance vehicle once widely used across Britain's railways. Built by D...

How can I best apply individual letter or number waterslide decals to a model?
There are a number of things we can do as modellers to ensure our decals are both easy to apply and look great when placed on a model. The first thing to bear in mind is the painted surface. Matt surfaces tend to be a little uneven and as such, when decals are applied to these surfaces they can leave telltale air bubbles. It may be possible to use a sharp implement to burst these bubbles, but that is not always practical. Gloss finishes are generally the best surfaces for applying waterslide decals. The main reason for this is they tend to be flatter than matt surfaces and as such are far less likely to trap air bubbles between the surface of the model and the decal.
One potentially annoying aspect of applying decals is the presence of excess and unwanted carrier film. Whenever possible it is best to trim a decal as close to its edges as is practical to remove unwanted carrier film. For roundels, this is reasonably straightforward but it can be a trickier prospect with individual letters or numbers. That said the same principle as before applies, by using a sharp knife, cut as close to the edges of the letters or numbers as possible. This is reasonably straightforward for letters like T and F but for B & O the carrier film in the middle can present a problem. In this case, run the knife gently around the inner edge of the letter. The secret here is to cut the decal but not the backing paper. When suitably damp the inner carrier film will separate whilst the backing paper still remains to offer structure to what would otherwise be a far more fragile decal.
Now we are ready to soak our decals, to do this simply immerse them in tepid water for between 20 and 40 seconds. Less than this and the decal is unlikely to separate from the backing paper and much more may result in the decal curling in on itself and washing away its own adhesive. Lay the decals to one side for a few minutes, this allows plenty of time for the water to thoroughly soak through the backing paper ensuring perfect separation when the time comes for placement.
Before placement, it is a good idea to prepare the surface with a specific decal setting solution such as DecalFix or Micro Set. This will help with the adhesion of the decal to the surface of the model. When applying any setting solution remember the principle 'less is more'. Setting solutions tend to contain ammonia and as such if large quantities are applied they can attack the varnish finish and underlying paintwork so apply small amounts only by brush.
If the decal is required to contour to an uneven surface then we may have to apply a more robust solution such as Micro Sol. The reason for this is that the surface tension of the decals carrier film will not allow it to easily contour to an uneven surface. Here we need to be especially mindful of the 'less is more' principle! This is because as the name indicates products such as Micro Sol contain significant amounts of solvent, so applying too much will weaken the carrier film too far and cause the decal to break up. Another thing to bear in mind is that most decal-setting solutions take several hours to become fully effective. As such apply a small amount when the decal is initially applied and then leave it for several hours or overnight to best gauge the effectiveness of the initial application.
Aligning individual numbers and letters can be tricky, if applied without care any resulting alignment can appear somewhat wonky. Where possible use a surface feature such as a panel line to act as a guide. Where this is not possible a small thin section of masking tape can act as an alignment aid and can easily be removed later without disturbing the decals.
When all decals are finally in place it is good practice to apply a final coat of either gloss or matt varnish, as is most appropriate to the model in question. This will provide a uniform finish for the model but will also help lock-in and protect any decals from subsequent handling.
Posted in: Decals / Transfers
Click here to receive the tips weekly in your mailbox. You can unsubscribe at any time.
Related products
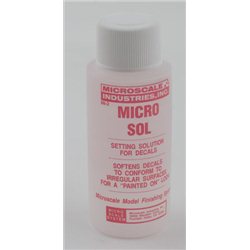
Micro Sol for softening decals
Price: £ 6.00Micro Sol is used for softening decals/transfers so they conform better to...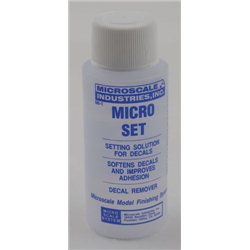
Micro Set for improving the adhesion of decals
Price: £ 6.00Micro Set is used for setting decals/transfers. The solution improves the...
Related posts
-
 Do I need to varnish after applying a decal?The simple answer is yes, it is advisable to varnish your decal, for a couple of reasons One being that if the model...
 - How do I apply decals to irregular surfaces?This is not as difficult as you would think. Normally you would dip your transfer in warm water to help remove it...
- How do I use Micro sol and Micro set with waterslide decals (transfers)?When you are at the final stages of making your model, apply a coat of gloss varnish this will give a nice smooth...
- Do I need to varnish before applying a decal?It is a good idea to give your model a coat of gloss varnish before applying decals as this helps with the gluing...
- Can you just varnish where you intend to place the decals?It is best to varnish the whole model. By coating the whole model in varnish, you are guaranteed a uniform finish...