Felix Pole was an ambitious employee of the Great Western Railway. Born in 1877, by the age of 27 he was working in...
No products
Product successfully added to your shopping cart
There are 0 items in your cart. There is 1 item in your cart.
Search Tips
How can I use two-part epoxy putty on my model or layout?
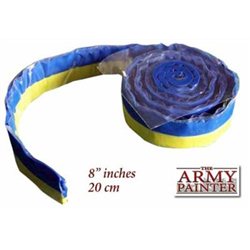
One of the most useful tools for a modeller to have in their tools/supplies stash is modelling two-part epoxy putty as it lends itself to a number of requirements and uses. Two-part Epoxy as the name suggests comes with two distinct components, namely a resin component and a hardener. When mixed together two-part epoxy creates a stronger bond than single medium epoxy which inevitably has greater possibilities for durability and longevity. Additionally, it also has better thermal qualities which means it will better stand up to seasonal changes in temperature and can be easily sanded.
The best place to start is to take similar amounts of both materials and roll them together. Once the resultant colour is consistent then both materials have been properly mixed together. The mix will stay pliable for a while allowing it to be worked. When shaping the material it is useful to have a small cup of water available. When the mixture starts to become tacky then wet your fingers or tools allowing greater working time.
To create a rope or steal hawser/strop then roll two identical lengths of epoxy into appropriately shaped tubes. Place the tubes together end to end and then gently plat them together. Gently damping the mix will assist in shaping the resultant strop to the required configuration for the model or layout. Using multiple tubes as mentioned above and placing them together can mimic tarpaulin covers around fixtures and fittings on a model, such as a gun barrel on a tank. Additionally, creating thin tubes as mentioned above can provide readily available lengths of material to fill gaps whilst assembling model parts or layout elements.
Flat rolling epoxy mix can produce a flat material that can then be configured to create other features such as doors, hatches or even roofing materials. Parts can easily be cut to size with a hobby knife by using a metal ruler for regular shapes or a small coin or similar item for circles. The material can even be shaped using a suitable frame to mimic curved surfaces. When shaped accordingly then surface features such as stippling can be added by a toothbrush or metal scouring pad to add irregular features thereby potentially mimicking a wide range of materials. Why not experiment with scratch-building additional items for your next project using two-part epoxy?
Click here to receive the tips weekly in your mailbox. You can unsubscribe at any time.


