Trees come in all shapes and sizes, some you can stand under and not be able to reach the bottom branch, some bottom...

Cart 0 Product Products (empty)
No products
Free shipping! Shipping
£ 0.00 Total
Product successfully added to your shopping cart
Quantity
Total
There are 0 items in your cart. There is 1 item in your cart.
Total products (tax incl.)
Total shipping (tax excl.) Free shipping!
Total (tax incl.)
Search Tips
Tips categories
Latest Tips
-
 How tall should trees be in N gauge?Read more
 -
 Can Dapol rolling stock couple to Graham Farish rolling stock?Read more
Modern Graham Farish and Dapol rolling stock should in theory couple together with little problem. This is thanks to...
-
 Can you fit a Train-Tech sound capsule to an N gauge model?Read more
Fitting any component inside an N gauge body shell can be challenging, and whether fitting a decoder, figures or even...
-
 Should I place lighting within a section of tunnel to make it more realistic ?Read more
Adding lighting to a tunnel can greatly enhance the realism of a model railway or scale modelling project. Tunnels...
-
 How do you apply decals to a curved surface?Read more
Most model kits will come with decals to help the modeller to add that final level of detail to a kit. Additionally,...

What painting options do I have for weathering a model aircraft cockpit?
Once the cockpit sub-assembly has been completed and painted there are a number of techniques that can be made to weather it, allowing it to come to life. If the instrument panel is dominated by analogue switches and dials it will lend itself very well to dry brushing. Many instrument panels are matt black or another similar dark colour. As such dry brushing with a metallic colour such as aluminium can help individual switches and dials 'pop' and come to life. One added benefit of this process is that the instrument panel itself would be dulled by the dry-brushing process which would be effective at presenting a fading of colour over time.
Cockpit floors and access panels are often subject to wear such as scuffs and scratches in the paintwork. The random effects of scratches can be reproduced by tearing a small piece of sponge from a scouring pad and dipping it in a metallic colour such as Aluminium paint. Excess paint can be wiped on a piece of tissue to leave a fine residue on the sponge segment. If this is then applied to the model in areas of greatest wear and tear this technique can be very effective at mimicking scratches and scuffs.
A pin wash can be applied to vertical and horizontal stringers on the fuselage interior. This will help simulate oil and grime that accumulates in these areas over time. Likewise, this technique can be applied to a wide variety of locations where deposits would collect.
The last thing to consider will be the cockpit canopy itself. Clear parts may sometimes come with a thin film of residue from the manufacturing process and can also be dulled by fingerprint grease if parts are excessively handled. One way to help bring a real shine to these parts is to either brush or dip them in a solution of 'Clear' and let this then naturally evaporate away. This will add a real lustre to the part enabling an eye-catching polished glass finish.
Either used individually or in varying combinations these techniques can be used to add realism to a model aircraft cockpit and will really help make the detail 'pop', especially if the cockpit is to be modelled with the canopy open. Why not give them a try on your next project!
Posted in: Painting
Click here to receive the tips weekly in your mailbox. You can unsubscribe at any time.
Related products

Model Air - Interior Green
Price: £ 3.00Model Air - Interior Green Developed especially for airbrush techniques, with...
Model Air - US Interior Yellow
Price: £ 3.00Model Air - US Interior Yellow Developed especially for airbrush techniques,...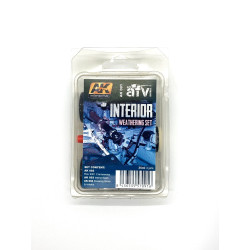
Related posts
-
 Do I need to use a primer?For best results it is advisable to use a primer as this will stick to the plastic and give a uniform coat of paint...
 - What is weathering?Weathering is a painting technique used by modellers to create the appearance of dirt and grime and even damage to...
- How do I clean brushes used with enamel paint?Enamel paint is solvent based, so trying to wash in water will not work, you need to use white spirit. It is...
- How do I fill holes in a model?There are many products on the market for filling holes: There are plastic putties straight out of the tube, there...
- What is the best size paintbrush?This would depend on what you are painting as paint brushes come in various shapes and sizes. I would say for...