Mainline Railways was a British model railway brand that operated between 1976 and 1983, introduced by Palitoy, the...
No products
Product successfully added to your shopping cart
There are 0 items in your cart. There is 1 item in your cart.
Search Tips
Easter shipping
Please note that couriers are not collecting on Friday 18th and Monday 21st April.
Orders will be dispatched on Tuesday 22nd April
How do I solder?
Safety warning
Soldering irons get very hot and can reach temperatures in excess of 400 degrees centigrade, so always take great care when using a soldering iron. Give consideration to the workspace where you will be soldering as hot soldering irons tend to destroy anything they touch including children, pets and the wife's new carpet! Most of these kinds of accidents are likely to get you in big trouble!
What will I need
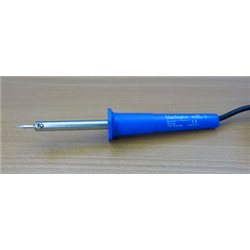
To solder, you will need a soldering iron, wet sponge to clean the tip of the soldering iron and some soldering wire (preferably the kind with flux added), a tool to strip the plastic flex from the end of your wires, a suitable working area and if you have one a helping-hand tool such as a clamp-like device for holding your wires in place.
Setting up
1. Before you start always make sure that the tip of your soldering iron is clean and free from old bits of solder and oxidants because they will transfer heat poorly and result in a bad join.
2. If your soldering iron has a thermostat, then heat the iron to just over 300`C, the melting temperature of solder is around 200`C, however, you will need the iron hotter to be able to quickly heat the surface area of the components that are to be soldered. The hotter settings on your soldering iron are for heating copper-based materials.
3. Prepare the wires that are to be soldered by stripping the plastic flex off the ends of the cables to expose their bare metal wires inside. The amount of flex that you should remove will depend on the job in hand, but a rough guide is to always strip enough off that you won't get any plastic cable flex melted into the join that you are about to create but also, don't strip so much off, that bare metal wire can touch any other components in your circuit.
4. Place the two surfaces to be soldered together by twisting the wires or clamping the components in a vice or jig etc.
Now it's time to solder
The concept is to heat the wires to be joined by touching them with the soldering iron, the solder is then offered up to the wires in such a way that it is touching the hot wires but not the actual soldering iron. The reason for doing it this way is because the solder contains flux, the job of the flux is to eat any oxidants on the metal, therefore, giving a better electrical connection, you only get one shot at it as the flux will very quickly burn off taking any oxidants with it, so If you were to apply the solder to the soldering iron and then try to transfer the solder onto the join, the majority of the flux would be wasted on the iron and not the join. Here are the steps to follow:
1. Heat the wires to be soldered by touching the soldering iron against them. Heat the wires evenly by using the side of the soldering iron to create the most contact between the soldering iron and wires, but be careful not to touch the cable's plastic flex as it will melt. It should only take a few seconds to heat the exposed wires enough for the next step.
2. Whilst keeping the soldering iron in contact with the wires offer up the soldering-wire so that it is touching the wires but not the soldering-iron. The soldering-wire will then melt and naturally pour along the exposed part of the wire.
3. When this happens, firstly remove the soldering-wire followed by the soldering-iron.
4. Wait a couple of seconds for the newly soldered join to set, then check that the two wires are now firmly joined together.
5. Wipe the soldering iron on the wet sponge to remove any solder so that it's ready for next time.
Helpful tips
1. When you're heating the wires or components so they're ready to receive the solder, don't be tempted to hold the soldering iron in place for too long, a couple of seconds will be enough to heat the wire enough to melt the solder. Keeping the iron in place for longer than this can allow heat to transfer along the wire and could cause damage to any components further along the circuit.
2. Don't worry if you see a little smoke, this is just the flux burning off. If you see a lot of smoke - worry!
3. Putting a blob of solder on the end of your soldering iron before you heat the wires will help with the heat transfer, but this is not intended to make the actual join.
4. If whilst being cautious you fail to heat your wires enough to melt the solder, don't worry! you can always try again. This is much better than damaging components.
5. A solder can always be redone once it has set, simply gently reheat the join and pull the wires apart.
6. Always remember to turn off your soldering iron after use. If you do forget and leave the house before realising, the helpline number is 999 and you should probably be prepared to stay with neighbours for a while!
These are just a few steps and tips to get you started in the world of soldering, as with most modelling, practice makes perfect, and we would always recommend having a go at soldering with a few off-cuts of wire first to get a feel for it.
Click here to receive the tips weekly in your mailbox. You can unsubscribe at any time.


