There are a number of ways to add weight to rolling stock so that it will better handle the track and is less likely...

Cart 0 Product Products (empty)
No products
Free shipping! Shipping
£ 0.00 Total
Product successfully added to your shopping cart
Quantity
Total
There are 0 items in your cart. There is 1 item in your cart.
Total products (tax incl.)
Total shipping (tax excl.) Free shipping!
Total (tax incl.)
Search Tips
Tips categories
Latest Tips
-
 How can I add a measured amount of weight to my rolling stock?Read more
 -
 How do I service my model railway locomotive?Read more
Servicing your model railway locomotive is an essential part of maintaining its performance and longevity. Regular...
-
 What glue and paint should I buy for my Airfix kit?Read more
Most Airfix kits do not include any paint or glue, if you are not used to making models this may seem like a bit of a...
-
 What different types of layout are there?Read more
There are many ways in which you can construct your layout, there are several common types that have names you might...
-
 What is a briar patch?Read more
A briar patch is a thicket formed from thorny plants and can often be found growing in abandoned or derelict sites as...

How do I wire up my first model railway layout?
If you’re new to model railways, one of the more daunting parts of the hobby can be figuring out how to wire up your railway and get it actually running. Proper wiring is essential for operations like controlling trains, running accessories, and lighting. The good news is, with some key tips, wiring your model railway doesn’t have to be scary or frustrating. Here are the basics of model railway wiring step-by-step.
Understanding the basic electrical systems
First, let’s quickly review the main electrical systems you’ll need to power:
Track power from the controller - Provides electricity to the metal rails to power any locomotives and rolling stock.
Point motors - power the motors that change the direction of the points.
Accessories - Power any accessories like signals, lights, turntable, etc.
For each of these, you’ll connect wires from the power source to the rails, terminals on the accessories, or controller. Having separate circuits allows you to power things on and off independently.
Choosing a power source
The most beginner-friendly power source is a standard DC transformer which converts household AC current to 12-16 volt DC current usable in your railway. Make sure the transformer has enough wattage for your setup.
To distribute power, you’ll need terminal strips or track distribution panels. These have multiple terminals to connect and splice wires from the transformer to the layout.
Connecting the rails and track
Use feeder wires with connectors to attach both rails to the power source terminals. Feeder wires carry electricity through the whole system. Use metal rail joiners to ensure smooth power transfer between track sections.
Make sure to test for smooth running before finalizing the layout. Insulate areas as needed with plastic or tape to prevent shorts.
Follow manufacturer wiring instructions for any accessories, lights and controllers. Use colour-coded or labeled wires for easy troubleshooting later.
Posted in: Power and control
Click here to receive the tips weekly in your mailbox. You can unsubscribe at any time.
Related products
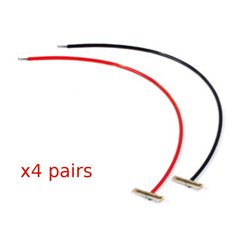
Power Feed Joiners Code 100 & Code 124
Price: £ 11.00Power Feed Joiners Code 100 & Code 124 8 power-feed rail-joiners (4x Red...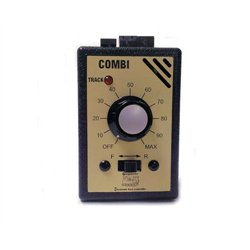
Single Track Controller with Plug in Transformer
Price: £ 67.00Gaugemaster Combi Controller - Plug in TransformerThis unit is sold without a...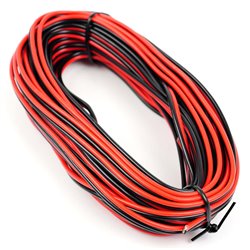
Related posts
-
 Can a "DCC ready" train be used on analogue?Yes, you can use a DCC ready train on your analogue layout. DCC ready just means that the train has been factory...
 - Is it difficult to fit a DCC decoder in to a DCC ready engine?In theory, it should be easy as the whole idea of being DCC Ready is to simplify the process. The first time I did...
- What is 7/0.2 wire?7/02 wire is a wire made of 7 strands of 0.2mm wire. Stranded wire has the advantage of being flexible while solid...
- Is an N Gauge controller compatible with OO Gauge?Yes, an N Gauge controller is compatible with OO gauge trains. You may have to change the power clip to the track...
- Is stranded wire better than solid wire?In my experience, stranded wire is preferable over solid wire. Stranded wire is more flexible than solid core wire,...