A puffer bottle is a manually operated specifically-shaped container that is used to prepare static grass for...

Cart 0 Product Products (empty)
No products
Free shipping! Shipping
£ 0.00 Total
Product successfully added to your shopping cart
Quantity
Total
There are 0 items in your cart. There is 1 item in your cart.
Total products (tax incl.)
Total shipping (tax excl.) Free shipping!
Total (tax incl.)
Search Tips
Tips categories
Latest Tips
-
 What is a puffer bottle?Read more
 -
 How can I learn where to place my signals?Read more
Deciding where to place signals on a model railway layout can be extremely confusing as there are many rules to...
-
 Which railway was the SNER?Read more
S.N.E.R. stands for the Scottish North Eastern Railway, it was the result of a merger between the Aberdeen Railway...
-
 What are powerbase plates used for?Read more
Powerbase plates sound as though they're going to be very high-tech with lots of microchips, wires and a complex...
-
 What is a Wickham Trolley?Read more
A Wickham Trolley is a small railway maintenance vehicle once widely used across Britain's railways. Built by D...

How can I best achieve realistic looking blade sag on the rotor blades of my helicopter model ?
Rotor-sag, sometimes also referred to as rotor droop produces a notable curve in the rotor blades of a parked helicopter. This is due to the weight of the blade itself and is quite noticeable on large helicopters. This effect which is unique to helicopters has always been an issue that modellers have to be aware of and compensate for in some way. Manufacturers are also aware of the issue and newer kits tend to recreate this effect by supplying blades that have a distinct, realistic and uniform curve to them.
Blade sag can be more of an issue on older kits which were inevitably moulded with a straight rotor blades. When completed this tends to result in an unrealistic looking spectacle of a parked helicopter whose stationary rotor blades are effectively defying the laws of gravity. A number of techniques can be used during the assembly which can negate this effect and result in realistic looking rotor sag.
Inevitably, the first thing to do is to conduct research into the subject matter and consult pictures of parked aircraft on the ground to determine the rate of droop, as inevitably the exact sag experienced will vary between aircraft types. The important thing to note is that the droop usually occurs in the first 1/3 of the length of the blade from the rotor hub as this is where the greatest weight is experienced.
Some modellers use a hot bend method, this effectively means dunking the blades in very hot or boiling water for about 30 seconds and then bending them over a suitably curved surface such as a spoon. Other modellers have taken a slightly different tack and laid the blades perpendicularly across a shallow box and then laid a weight across the blades to impart a sag.
Another technique used is the cold bend. Under this method the modeller will cut the blade from the sprue and impart a curve by gently bending the first 1/3 of the blade between their fingers. If done carefully and incrementally this can be a highly effective technique although it can result in inconsistent degrees of curve across the rotor blades as they are effectively curved one at a time.
Another option may well be to attach the rotor blades to the rotor head and impart the curving process to the completed rotor hub. This can be achieved by placing the rotor head upside down over the rim of a suitably sized bowl and then slowly add weight to the rotor hub until the correct effect is achieved. This has the advantage of slowly applying a consistent degree of curve to each of the blades simultaneously.
Whatever the method used, a slow-but-steady approach based on thorough research can result in a highly realistic looking effect that adds that final touch of detail to a model.
Posted in: Best practices
Click here to receive the tips weekly in your mailbox. You can unsubscribe at any time.
Related product
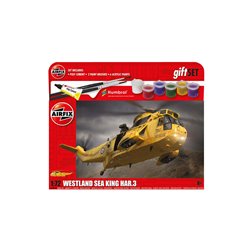
Gift Set - Westland Sea King HAR.3 - 1:72 scale...
Price: £ 19.99Gift Set - Westland Sea King HAR.3 - 1:72 scale model kit
Related posts
-
 Do I need a respirator?If you are using an aerosol spray paint you should always use one. Always read the manufacturer’s...
 - How to remove super glue (cyanoacrylate)?Cyanoacrylate is best known as super glue. The best way to remove it is with acetone or an acetone-based product...
- What is the best wood for baseboards?The most common wood for baseboards is probably chipboard as this is relatively inexpensive. Plywood is another...
- How do I stick parts together for a test fit?There are several trains of thought on the best way to secure parts together temporarily. Some suggest using a small...
- How to clean model railways track?There is of course the old tried and tested method, the track rubber which does the job, no railway modeller should...